As some of you might have heard, about a year ago (on July 1st, 2021), Microsoft stopped accepting cross-signing as a way to sign and install drivers on any version of Windows. This change affected most companies that develop their own drivers, including Safetica. I was tasked with researching and implementing the proper way to sign our drivers after July 1st. Since the research has been finished for some time now and we are currently signing our drivers through an Azure pipeline, I decided to write an article describing this journey. I hope it will provide an insight into what some of us work on here at Safetica and how the entire HLK signing process works from a developer’s point of view.
![]()
Let’s go over the steps that are required in order to sign a driver using Microsoft HLK.
Preparation steps
First and foremost, you need to be part of Microsoft Partner Network [Partner with Microsoft] and have a Partner Center account [What is Partner Center? – Partner Center | Microsoft Docs]. Specifically, you will need to have access to Hardware submission service inside Microsoft Partner Center [Partner Center – Hardware (microsoft.com)]. Furthermore, you will also need to get an Extended Validation (EV) code signing certificate and add it to your Partner Account [Get a code signing certificate – Windows drivers | Microsoft Docs].
Once you have all the certificates and accounts ready, we move on to preparing the machines that will execute the tests. You will need the following:
- 1x Controller for every OS version you are targeting and a running Windows Server matching the Windows version you are targeting (i.e., to sign your driver for Windows 11, you will need your controller to run Windows Server 2022)1.
- You can use a physical machine or a virtual machine (MS provides pre-configured VMs here: Windows Hardware Lab Kit | Microsoft Docs).
- HW requirements: Windows HLK Prerequisites – Test server | Microsoft Docs.
- You must be able to connect to the client machine, which we will configure in the next step.
- To prepare the controller for testing, follow the instructions here: Step 1 Install Controller and Studio on the test server | Microsoft Docs.
- 1x Client machine for each OS version you are targeting (Win10, Win8, etc.); as of now, bitness doesn’t matter.
- You must use a physical machine.
- HW requirements: Windows HLK Prerequisites – Test system | Microsoft Docs.
- You must be able to connect to the controller machine, which we configured in the previous step.
- There are also a few undocumented requirements.
-
-
- If you have a CD/DVD drive, you will need a CD/DVD disc, because the tests verify whether the drive works.
- If you have an audio card, you will need a physical audio output device (speakers/headphones – you need to connect them through a 3.5mm jack, otherwise it will create its own audio card and won’t help). Alternatively, you can use this handy little tool, which can simulate audio output (VB-Audio Virtual Apps). Simply just run it and the tests won’t complain.
-
- To prepare the client for testing, follow the instructions here: Step 2 Install Client on the test system(s) | Microsoft Docs. You can also run the installer directly from server.2
Running the tests
After you set everything up, let’s move on to configuring and running the tests through HLK Studio. Each step mentioned in this section is done on the Controller machine.
Prepare the client to run the tests
- Open “HLK Studio” → Configuration {Picture 1}
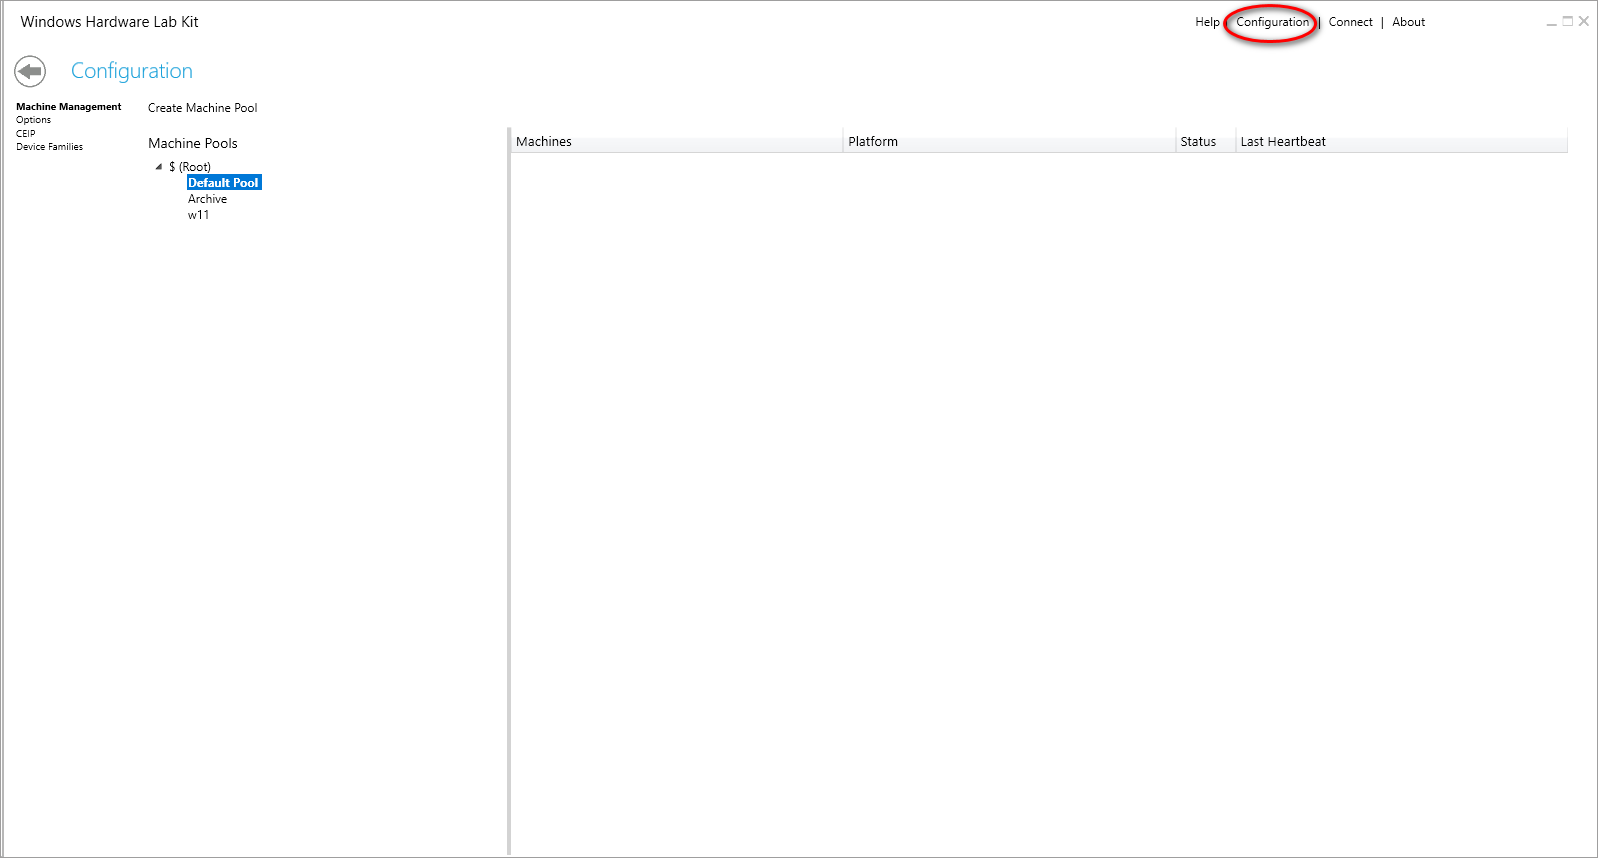 Picture 1: Switch to Configuration view
- Right click "$(Root)" → Create Machine Pool → Enter a name you will remember.
- Click “Default pool” → Your client should be visible → Drag & drop it to your newly created pool.
- Click your newly created pool → Right click your client machine → Change machine status → Select Ready.
- Keep in mind that the window that lists your machine doesn’t refresh automatically. In other words, you will need to click out of the view and back to see whether the state has been updated to “Ready”.
Troubleshooting
I can’t create a new pool.
– Try a different name or restart HLK Studio. I had a pool stuck in some kind of limbo once and had to reinstall the entire HLK Studio.
I don’t see my client machine in Default Pool.
– Ensure that your client can see the server on the network and vice versa. This is most likely a connectivity/different domains issue.
Changing status to Ready doesn’t work.
– As mentioned above, make sure you change the view to something else, i.e., click “Default pool”, which should be empty, and then back to your custom pool.
– If it still doesn’t change or changes back to “Not ready”, then your client machine is not installed properly. You will need to reinstall that machine and ideally follow the tip2.
Running your first test
- Go to Project menu {Picture 2} → Click Create project → Pick a custom name and confirm the prompt.
- Windows Driver Project checkbox should stay unticked unless you are testing WDF drivers.
- Windows Driver Project checkbox should stay unticked unless you are testing WDF drivers.
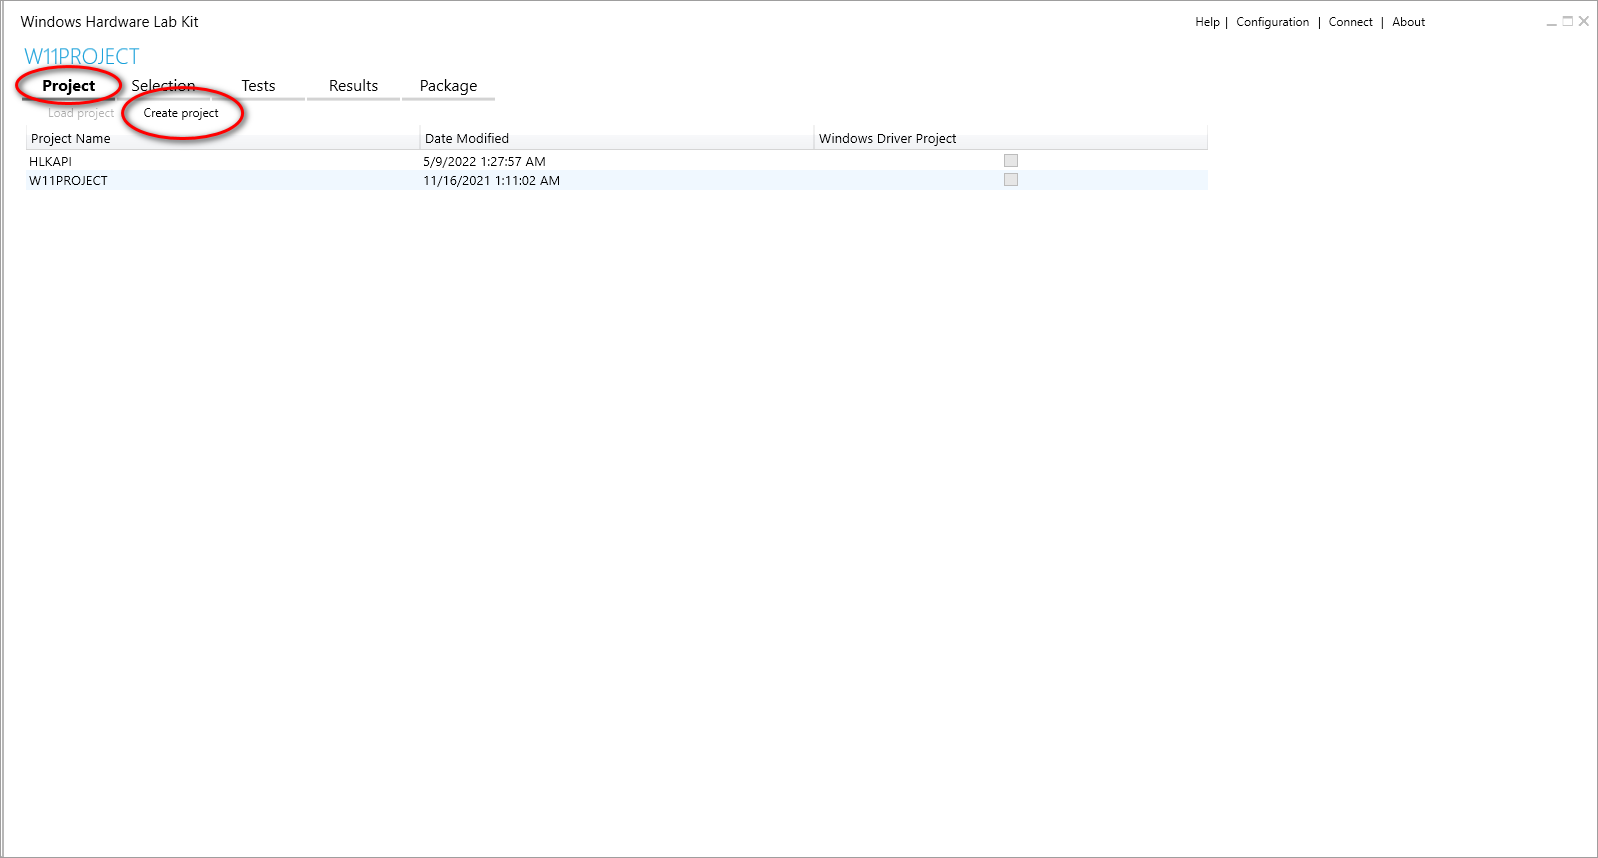 Picture 2: Create a new project
- Click your newly created project → click Load Project.
- Go to Selection tab {Picture 3} → Click Pool dropdown {Picture 4} the dropdown text should read “<No Pool Selected>”) and select the pool you created in Prepare the client to run the tests sub-chapter.
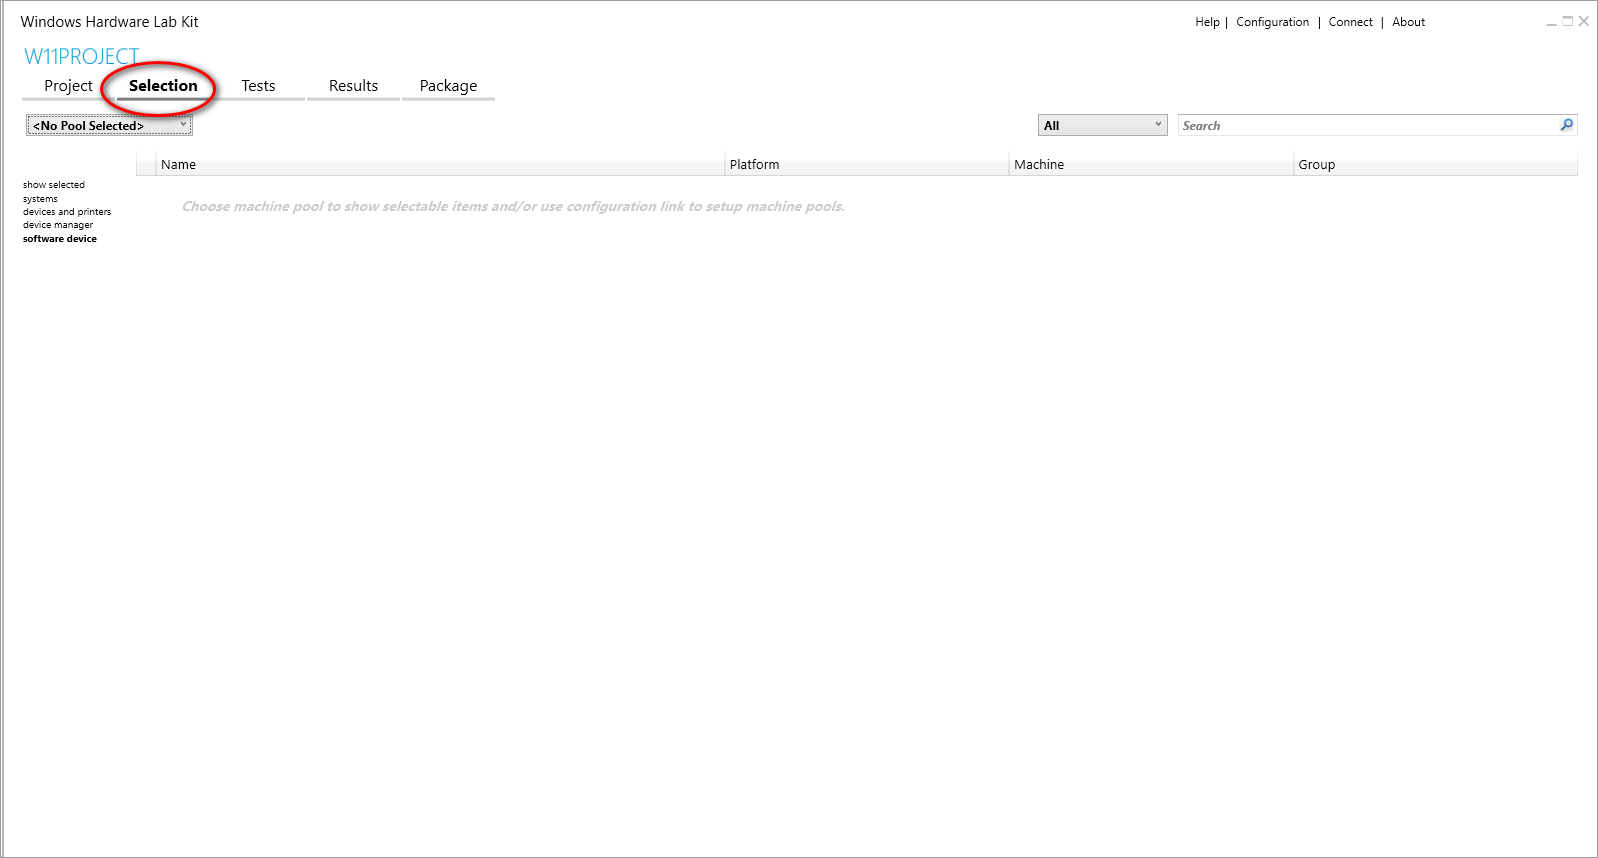 Picture 3: Switch to Selection view
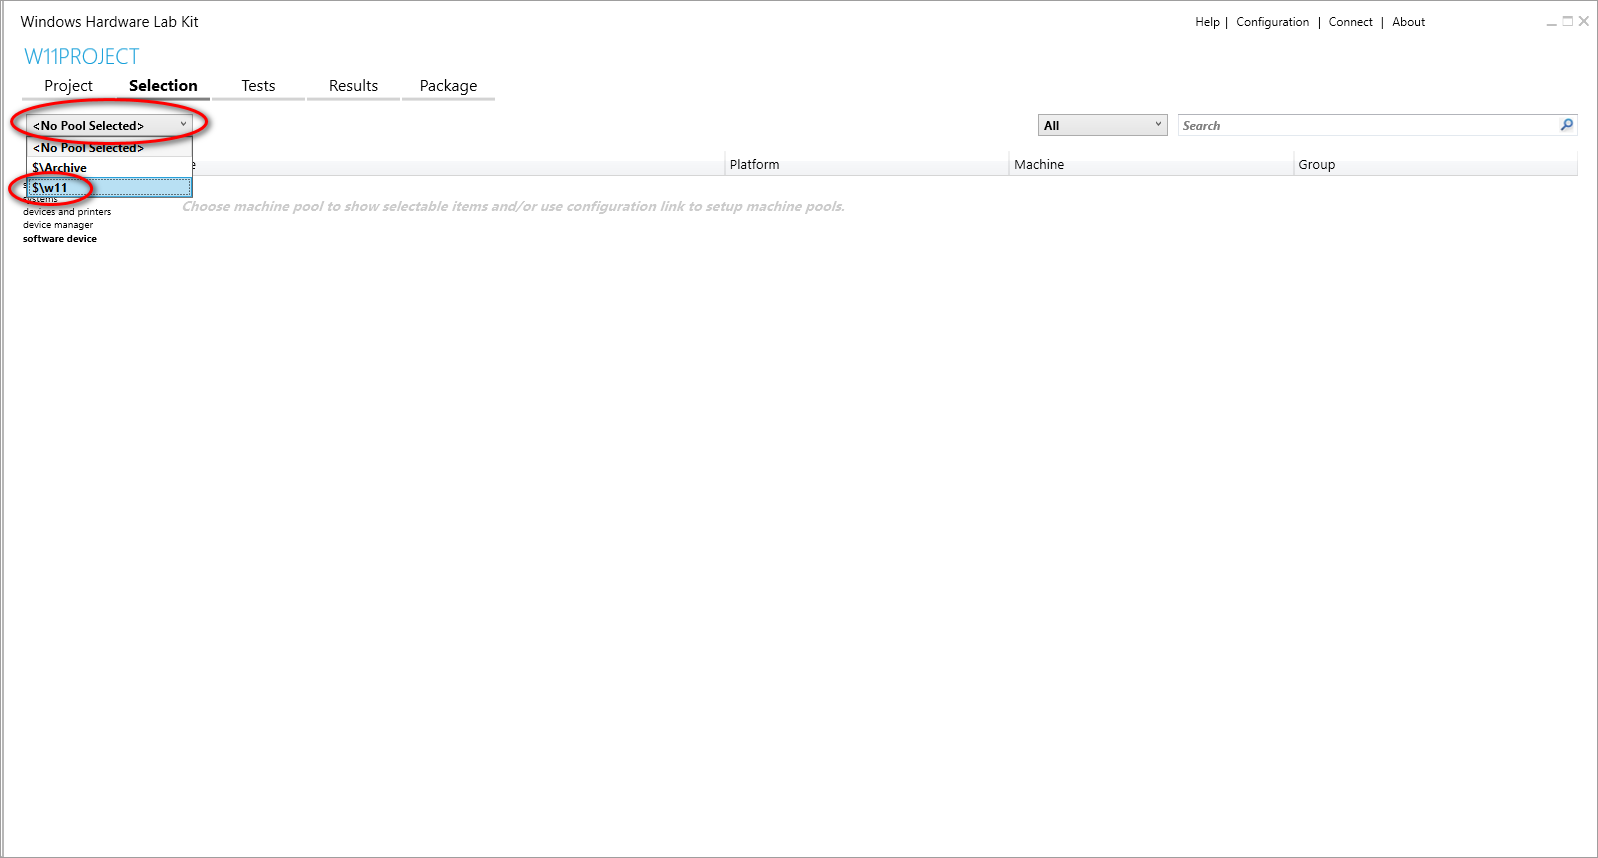 Picture 4: Select your pool
- Select Software Device from the left-hand side menu {Picture 5} → Find the driver you want to sign and tick the checkbox next to it {Picture 6}.
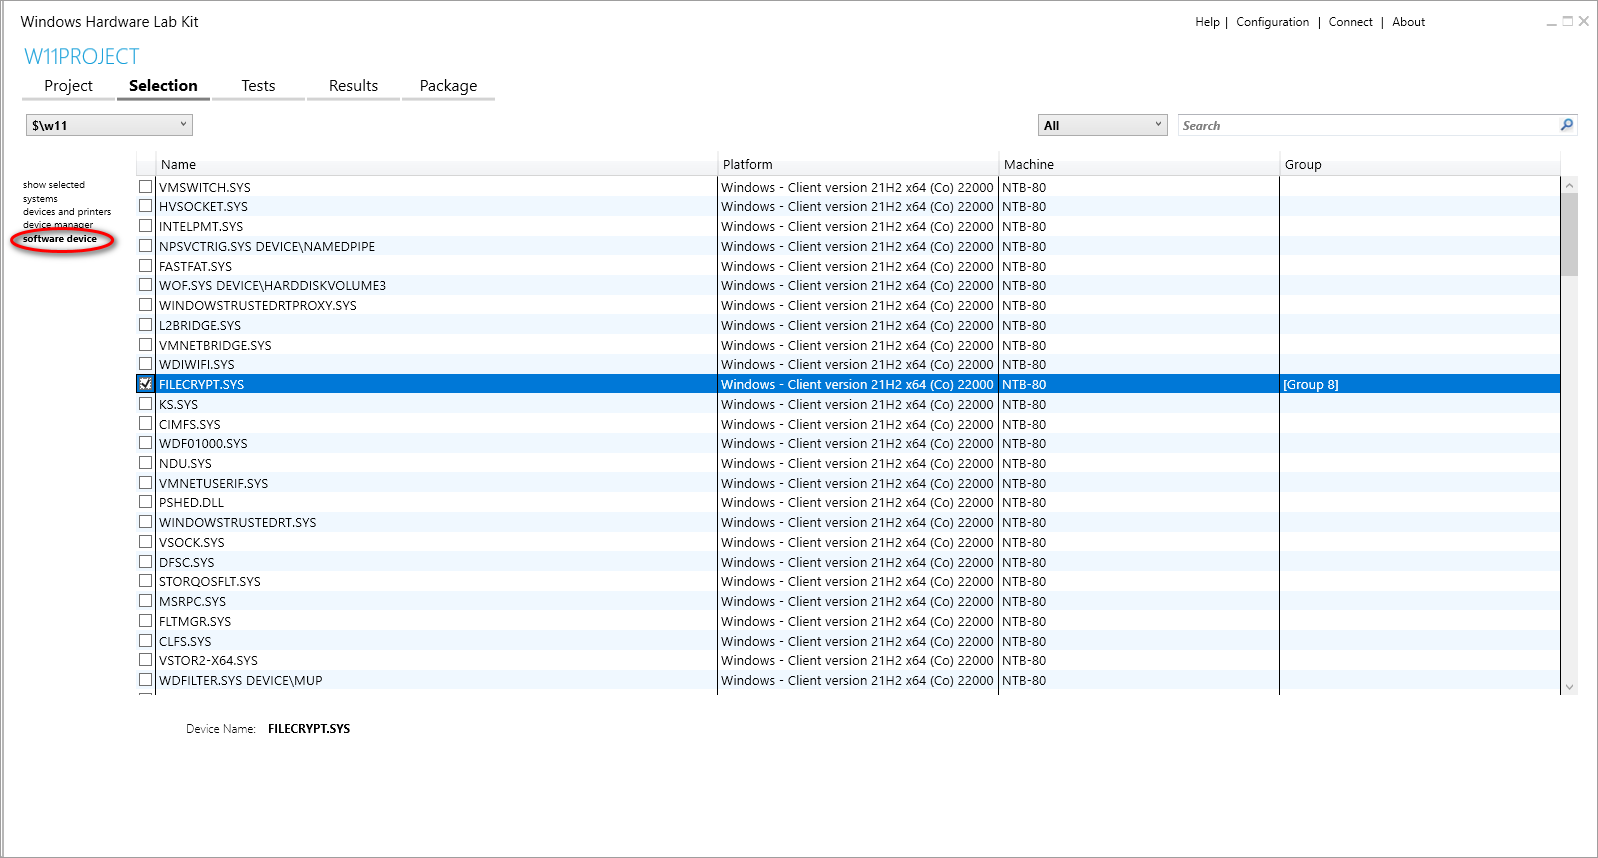 Picture 5: Select the correct driver list category
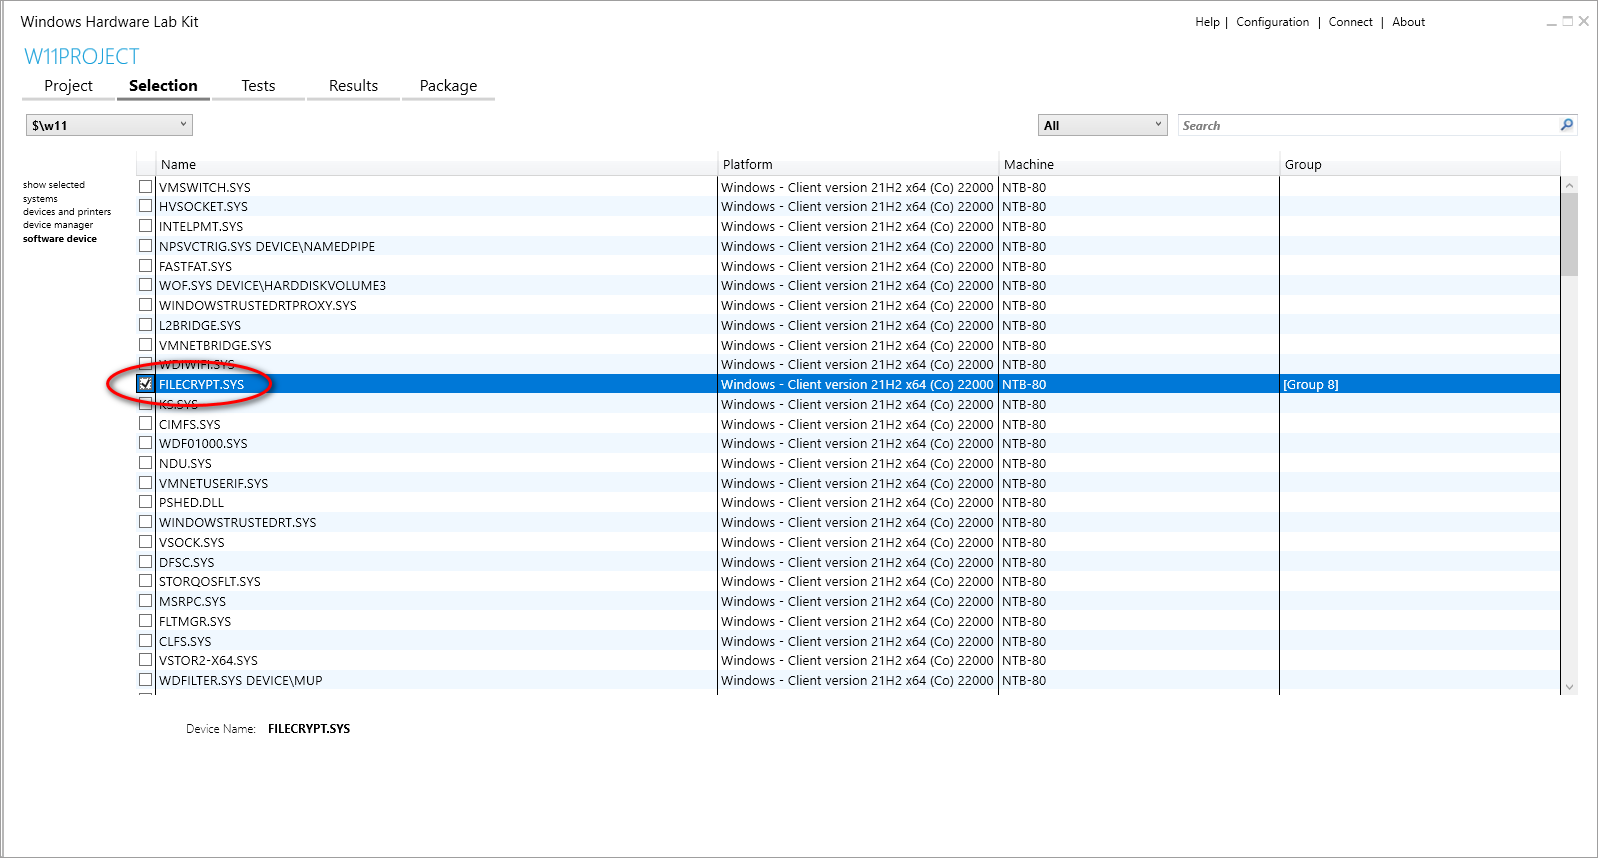 Picture 6: Select your driver for testing
- Go to the Tests tab {Picture 7}.
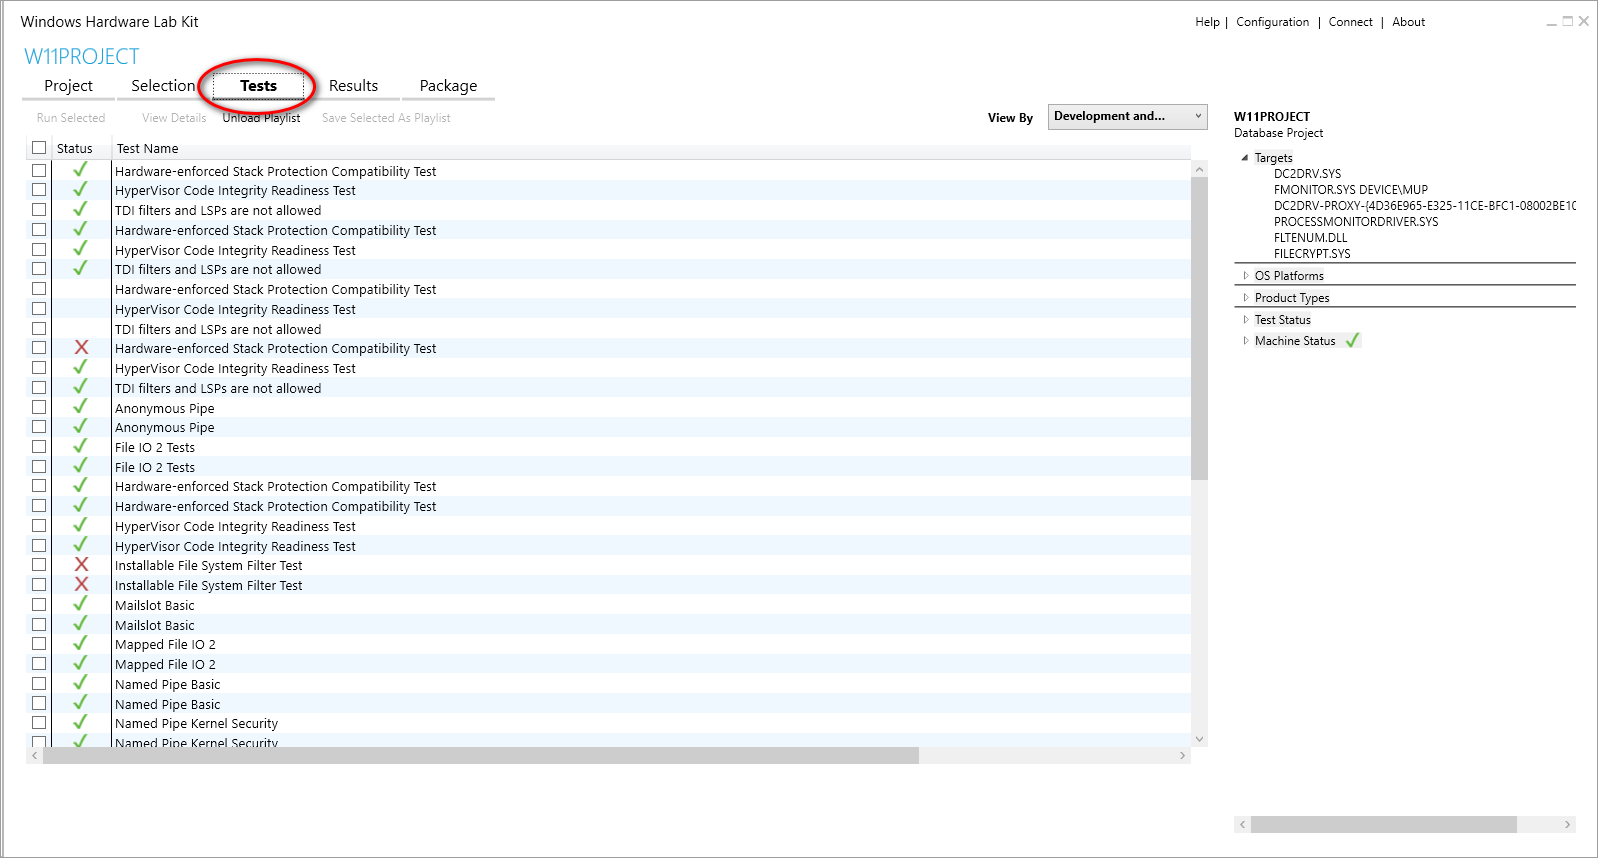 Picture 7: Switch to Tests view
- For the next step, you will need to download the test playlist from MS documentation Windows Hardware Lab Kit – Download Windows Hardware Compatibility playlist | Microsoft Docs.
- Click Load playlist and navigate to where you extracted the downloaded playlist from the previous step → Open playlist ending with …ARM64 x64.xml (assuming that you are on x64 platform).
- You should now see only the tests that are required to pass Microsoft certification → Select all tests by ticking the top-most checkbox {Picture 8}.
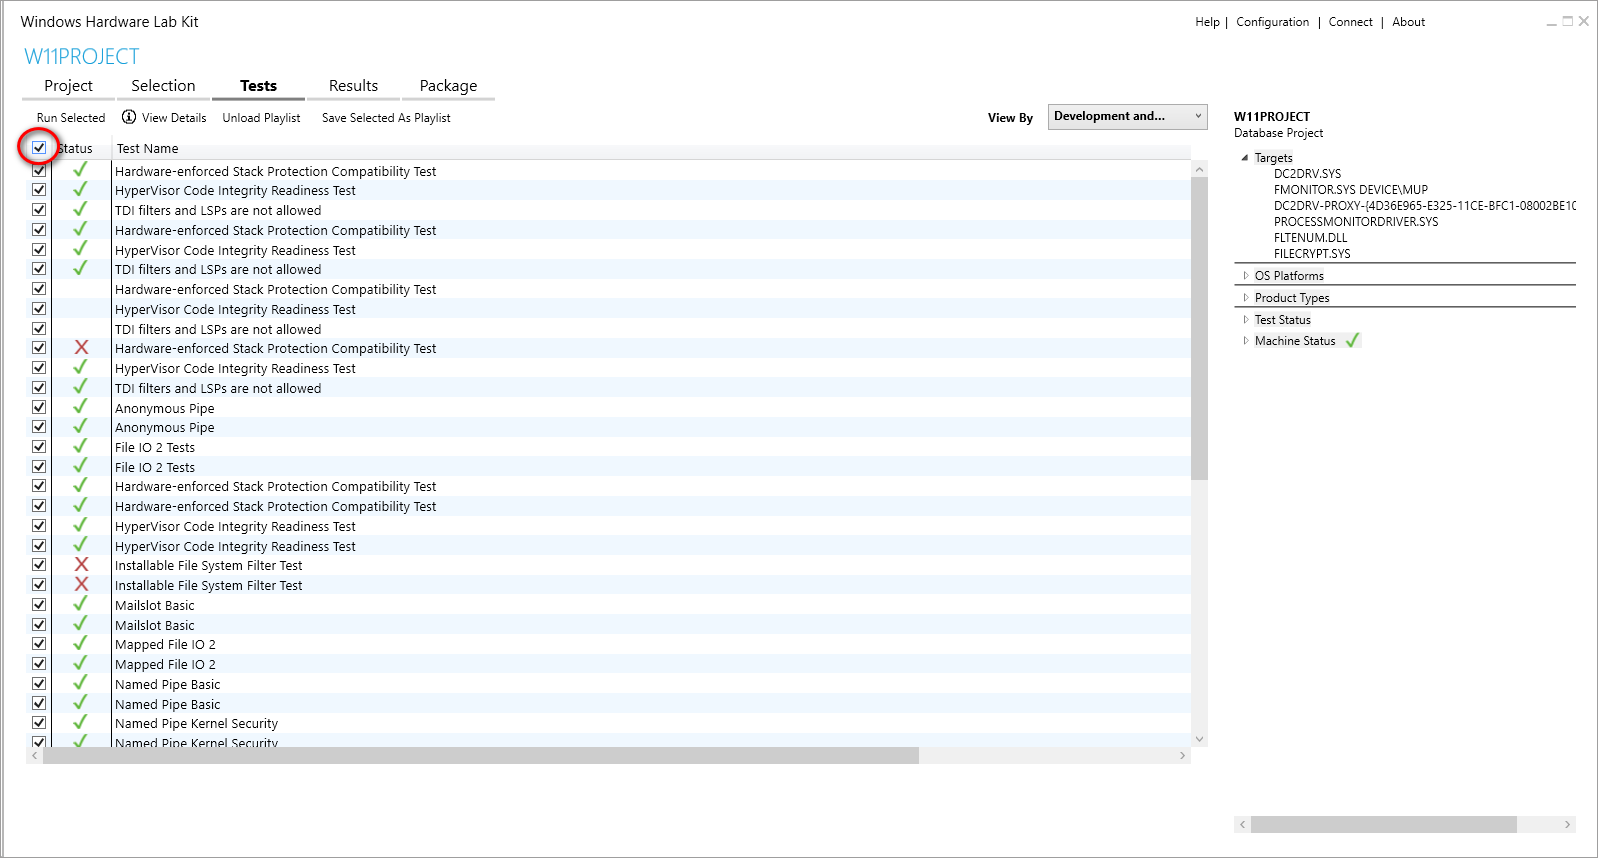 Picture 8: Select which tests to run
- Click Run Selected → Wait for all tests to finish (doesn’t matter if some of them fail, see next step).
- Now you will need to filter out obsolete/unpassable tests → Download Windows HLK Filters Windows Hardware Lab Kit Filters | Microsoft Docs and copy them to the location specified on the page from the link → Click Apply Filters.
- If there are still some fails, even after applying the filters from the previous step, you will need to fix them before proceeding.
- Expand the first test that failed until you get to “Logs”. This item usually contains a .wtl file which is a log from running the test → Double click it and HLK Manager should open with the correct log already loaded → From the View dropdown, select “Failure” {Picture 9} → Expand the failed test log and try to understand what failed {Picture 10} → otherwise, refer to the tests’ documentation HLK Test Reference | Microsoft Docs.
 Picture 9: Filter out only failed tests
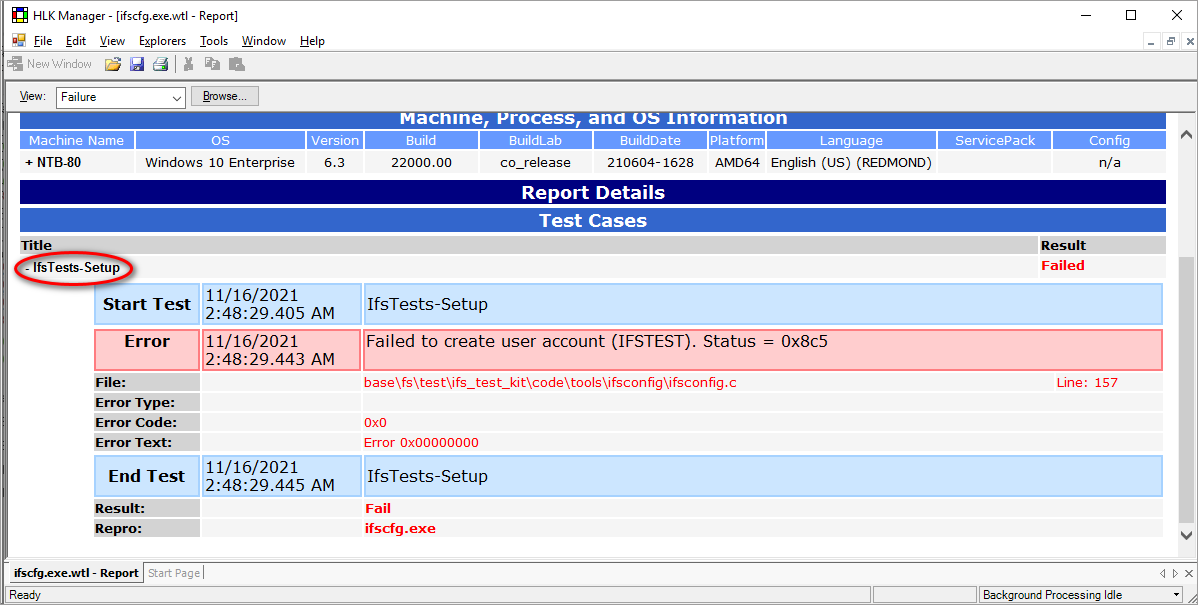 Picture 10: Analyze the information inside HLK Manager
-
- If the failure is from the HLK Readiness test, make sure that you went through and prepared all the “Undocumented requirements” I mentioned in the section about setting up your client.
- If the failure is from the HLK Readiness test, make sure that you went through and prepared all the “Undocumented requirements” I mentioned in the section about setting up your client.
Submitting the result package
Assuming all your tests passed successfully, you are ready to create a package from the test results which will be used as proof of your driver passing all the tests.
- If you closed HLK Studio, then open it and load your project created in the previous section.
- Go to Package tab → Add Driver Folder → Select the folder containing the driver binary and symbols you ran on the client → Select all localizations (I am not exactly sure what this changes, but at least 1 localization is required).
- Click Create Package → We are selecting “Do not sign” here, but if another option makes sense for you then select that. In our case, we will need to sign the package with the certificate that we uploaded to Partner Center in Preparation steps.
- Go to Partner Center Partner Center – Hardware (microsoft.com) and click Submit new hardware {Picture 11} → Navigate to your signed package and drag & drop it to the specified box on the new submission page.
 Picture 11: Create new hardware submission
- Click Submit the submission and wait for MS to verify your package.
- If the verification process fails, you will be provided with an error log containing some information that should help you identify the issue.
- If the verification process fails, you will be provided with an error log containing some information that should help you identify the issue.
- Once the submission verification process is finished, you can open the details and click Download signed binaries {Picture 12}.
 Picture 12: Download the package containing signed drivers
All the steps done in HLK Studio and Partner Lab can be done through Microsoft APIs HLK API Overview | Microsoft Docs, but going into detail about how to set them up is beyond the scope of this article.
[1] Initially I was able to connect clients from different OS version to one Controller, that doesn’t seem to work anymore.
[2] A tip that worked for me was to always install the client through an installer located inside a folder shared by the server. This ensures that your machines can communicate with each other correctly. If you can’t see the folder, then you have a different network issue that you need to address separately before proceeding.

Author
David Pořízek
DLP Developer @Safetica
Next articles

Engineering
Blog articles

Engineering
Blog articles
Azure Functions: SOLID-compliant service factory
How to process multiple implementations of one service interface and inject one of them based on the data type? Our colleague wrote an article to share his know-how. Read more.
Engineering
Blog articles